
A coffee spill before work, a fast-food bag that leaked on the drive home, or muddy cleats after practice can leave a car seat looking permanently marked. The good news is that learning how to remove seat stains is usually less about buying an aggressive cleaner and more about using the right method for the stain and seat material.
The wrong approach can spread a stain, leave a water ring, soak the padding, or damage leather coatings. Start gently, work in small sections, and give the seat enough time to dry. That approach protects both the appearance of your interior and the vehicle’s resale value.
Identify the Seat Material and the Stain First
Before applying anything, check the seat’s material. Most vehicles have cloth upholstery, leather, vinyl, or a mix of materials. Cloth is durable but absorbent, which means spills can reach the foam underneath. Leather needs less moisture and should not be scrubbed with household cleaners. Vinyl is generally easier to clean, but harsh solvents can dull its finish or make it brittle over time.
Next, consider what caused the mark. A fresh soda spill calls for a different treatment than dried grease, road salt, ink, or pet accidents. If you can identify the stain, you can avoid adding products that make it harder to remove.
Check the owner’s manual or upholstery tag if available, especially on newer vehicles with coated leather, suede-like inserts, or light-colored interiors. When in doubt, test any cleaner on a hidden spot near the seat base first. Wait a few minutes and check for fading, discoloration, or a change in texture.
What You Need to Remove Car Seat Stains
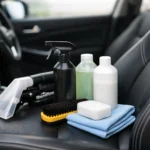
For most cloth-seat stains, you do not need a cabinet full of detailing products. Start with a vacuum, clean microfiber towels, a soft upholstery brush, warm water, and a dedicated automotive upholstery cleaner. A wet/dry vacuum or compact extractor can be useful for deep stains, but it is not required for routine spills.
Avoid using dish soap, laundry detergent, bleach, glass cleaner, or strong all-purpose cleaners as a first choice. Some may leave sticky residue that attracts more dirt, while others can discolor fabric or strip protective finishes from leather and vinyl.
For leather seats, use a pH-balanced leather cleaner and a clean microfiber towel. For vinyl, use a mild interior cleaner labeled as safe for vinyl or plastic. Keep conditioner separate from cleaning: conditioner can help leather stay supple after it is clean, but it will not remove a stain on its own.
How to Remove Seat Stains From Cloth Upholstery
The best rule for cloth seats is simple: blot, do not scrub. Scrubbing pushes the spill deeper into the fibers and can create a larger faded area around the original stain.
Start by vacuuming dry debris
If the stain includes dirt, crumbs, dried mud, or loose powder, vacuum the seat first. Cleaning over grit can grind particles into the fabric and make the job more difficult. Use a crevice tool around seams, where spills and debris tend to collect.
Blot fresh spills immediately
Press a dry microfiber towel or absorbent paper towel onto the spill. Lift and reposition the towel repeatedly rather than rubbing side to side. Continue until the towel is no longer picking up moisture.
For a fresh liquid spill, lightly mist an upholstery cleaner onto a towel or directly onto the affected area according to the product directions. Work from the outer edge of the stain toward the center. This helps prevent a visible ring from forming.
Clean in light passes
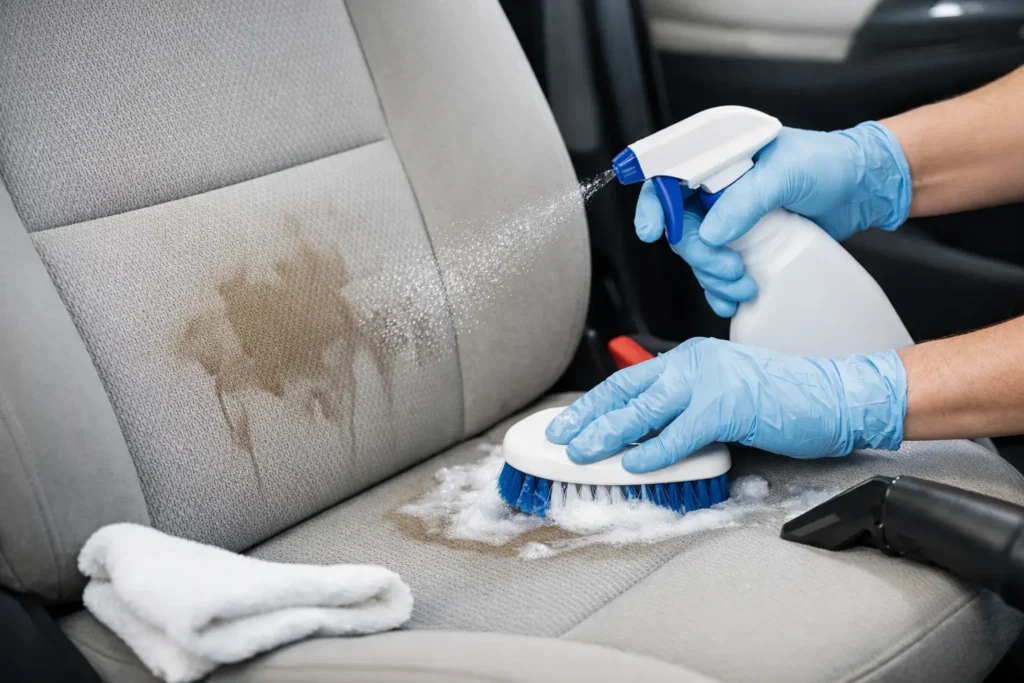
Use a soft upholstery brush to gently agitate the cleaner if the stain has dried or settled into the fabric. Do not saturate the seat. Excess liquid can soak through to the foam cushion, causing odors, slow drying, and sometimes mold growth in humid conditions.
After brushing, blot the area with a clean damp microfiber towel to lift cleaner and loosened residue. Follow with a dry towel. Repeat only as needed. Several gentle passes are safer and often more effective than one heavy application.
Extract moisture and dry the seat fully
If you have a wet/dry vacuum or upholstery extractor, use it after cleaning to pull moisture from the fabric. Make slow overlapping passes without pressing too hard into the cushion. If you do not have extraction equipment, use dry microfiber towels and press firmly to absorb as much moisture as possible.
Leave the doors open in a dry, shaded area or run the vehicle’s fan with the windows cracked. Avoid parking in direct hot sun immediately after cleaning, particularly if the seat is very wet. Heat can set residue or create uneven drying marks. Do not sit on the seat until it is dry to the touch.
Treat Common Stains Without Making Them Worse
Some stains need a more targeted approach, but restraint still matters.
Coffee, soda, and juice: Blot the spill first, then use an upholstery cleaner to address the sugar and color residue. If the drink contained milk or cream, make sure the seat dries thoroughly, since leftover organic residue can create odor.
Grease and oily food: Remove excess material with a dull plastic card or spoon. Apply an upholstery cleaner designed for oil-based stains and blot carefully. Water alone often spreads grease rather than lifting it.
Mud and dirt: Let heavy mud dry completely, then vacuum it. Treat the remaining discoloration with upholstery cleaner. Trying to wipe wet mud usually turns a small spot into a broad brown smear.
Road salt: Salt can leave stiff white rings on cloth seats in winter. Lightly clean the area with a fabric-safe upholstery cleaner, then blot it dry. Repeat as needed rather than soaking the fabric.
Ink: Work slowly and test first. Dedicated interior stain removers are the safer choice because many home remedies can spread ink or damage the fabric dye. Dab from the outside inward and change towels often so you are not transferring ink back onto the seat.
Pet accidents or vomit: Remove solids carefully, blot moisture, and use an enzyme-based automotive upholstery cleaner. Standard cleaners may improve the appearance but fail to break down the organic material causing the odor. Deep contamination may require extraction or professional treatment, especially if it reached the seat foam.
Cleaning Leather and Vinyl Seats Safely
Leather and vinyl seats should be cleaned with minimal moisture. Spray cleaner onto a microfiber towel rather than directly onto the seat whenever possible. Wipe gently, paying attention to seams and perforations, then buff dry with a second towel.
For leather, avoid soaking perforated panels. Moisture can get beneath the surface and may be difficult to remove. Once the seat is clean and dry, apply a light coat of quality leather conditioner if the product is appropriate for your vehicle’s leather type. Modern coated leather does not need heavy conditioning, so more product is not better.
Vinyl seats often respond well to a mild interior cleaner and soft brush for textured areas. Skip shiny dressings on seating surfaces. They can make seats slippery and may transfer onto clothing.
When DIY Cleaning Is Not Enough
A stain may look clean on the surface but return after the seat dries. This usually means the spill reached the foam, then wicked back up through the fabric. A second light cleaning followed by thorough extraction can solve the issue.
Consider professional detailing when there is widespread staining, persistent odor, water damage, mold, dye transfer, or contamination that has been sitting for a long time. Professional extraction equipment can remove moisture and residue more effectively than towel blotting alone. It may cost more than DIY cleaning, but replacing upholstery or repairing a lingering odor costs considerably more.
Prevent the Next Stain
A clean car is easier to maintain than restore. Keep a small microfiber towel in the glove box or cargo area so fresh spills can be blotted immediately. Vacuum seats regularly, particularly around seams, and use seat covers when transporting pets, children, work gear, or messy sports equipment.
For cloth upholstery, a fabric protectant can make future spills easier to blot up, though it is not a substitute for prompt cleaning. Reapply it only after the seat is fully clean and dry.
The most useful habit is acting early. A stain that gets blotted within minutes may take one careful cleaning pass; the same spill left for a week can work its way into the padding. Keep the process gentle, let the seat dry completely, and your interior will stay more comfortable and easier to sell when the time comes.