
A driver’s seat can start looking tired long before the rest of the cabin does. Sun exposure, body oils, denim dye, dry air, and routine sliding in and out all take a toll. Learning how to condition leather seats helps preserve their feel and appearance, but the wrong product or too much product can leave the surface shiny, slippery, or streaked.
The goal is not to soak leather with conditioner. Most modern vehicle seats are protected with a clear factory coating, so they need gentle cleaning and light, occasional conditioning rather than heavy treatment. Done correctly, this is a simple DIY job that can help your interior stay comfortable and support resale value.
First, Know What Type of Leather You Have
Most leather seats in modern cars, trucks, and SUVs are coated or semi-aniline leather. They have a protective top layer designed to resist spills and wear. The leather still benefits from appropriate care, but it does not absorb conditioner like an uncoated leather boot or sofa might.
Older luxury vehicles, specialty models, and some high-end trims may use more natural, uncoated, or lightly coated leather. These surfaces can be more sensitive to cleaners and may darken when treated. If water drops quickly soak into an inconspicuous area rather than bead on top, use extra caution and test every product first.
Also confirm that your seats are genuine leather. Many vehicles use vinyl, synthetic leather, or a mix of materials across the seating surfaces. Conditioner formulated for real leather will not necessarily hurt synthetic upholstery, but it may leave an unnecessary residue. A gentle interior cleaner and protectant made for vinyl or synthetic leather is usually the better choice in that case.
What You Need to Condition Leather Seats
You do not need a shelf full of detailing products. Start with a vacuum, a few clean microfiber towels, a soft upholstery or leather brush, a pH-balanced leather cleaner, and a quality leather conditioner appropriate for automotive use.
Avoid household cleaners, dish soap, bleach, ammonia, furniture polish, silicone-heavy dressings, and oils such as olive or coconut oil. These can strip the protective finish, make the seats overly glossy, attract dirt, or create a slick surface. A leather seat should look clean and naturally matte or satin, not wet and shiny.
Choose a conditioner that states it is safe for automotive leather. Products with built-in UV protection are particularly useful for vehicles parked outdoors. Even so, conditioner is not a substitute for a windshield sunshade or covered parking when the weather is hot.
How to Condition Leather Seats Step by Step
Conditioner works best on clean leather. Applying it over grime, sunscreen residue, or body oils can trap that contamination against the surface and make the seats look worse over time.
1. Vacuum the seats and seams
Move the front seats back and vacuum the cushions, seatbacks, bolsters, stitching, and creases. Use a soft brush attachment if available. Pay attention to the gap between the seat bottom and backrest, where grit can collect and gradually wear the material as you move around.
Do not skip this step. Loose dust and sand can act like fine abrasives when you begin wiping or brushing the leather.
2. Test products in a hidden area
Apply a small amount of cleaner and conditioner to a hidden spot, such as the lower edge of the seat or a section near the seat rails. Let it dry fully and check for darkening, color transfer, tackiness, or a change in sheen.
This quick test matters most on light-colored seats, older leather, perforated leather, and uncoated leather. If the surface reacts poorly, stop and choose a milder product.
3. Clean one section at a time
Spray leather cleaner onto a microfiber towel or brush, not directly onto the seat. This gives you more control and prevents excess liquid from running into perforations, seams, switches, or heated-seat components.
Work on a small section using light pressure. A soft brush can help lift grime from textured leather and stitching, especially on the driver’s seat bolster and steering-wheel-side edge. Immediately wipe the area with a separate clean microfiber towel.
For stubborn transfer from blue jeans or dark clothing, repeat the gentle cleaning process rather than scrubbing harder. Aggressive rubbing can damage the color coating before it removes the stain. If dye transfer remains after a few careful passes, a professional detailer may be the safer next step.
4. Let the leather dry completely
Give the seats time to air dry before conditioning. In most cases, 15 to 30 minutes is enough, though humid weather may require longer. Do not use a hair dryer, heat gun, or direct high heat to speed up the process. Excess heat can dry the material and stress the finish.
5. Apply conditioner sparingly
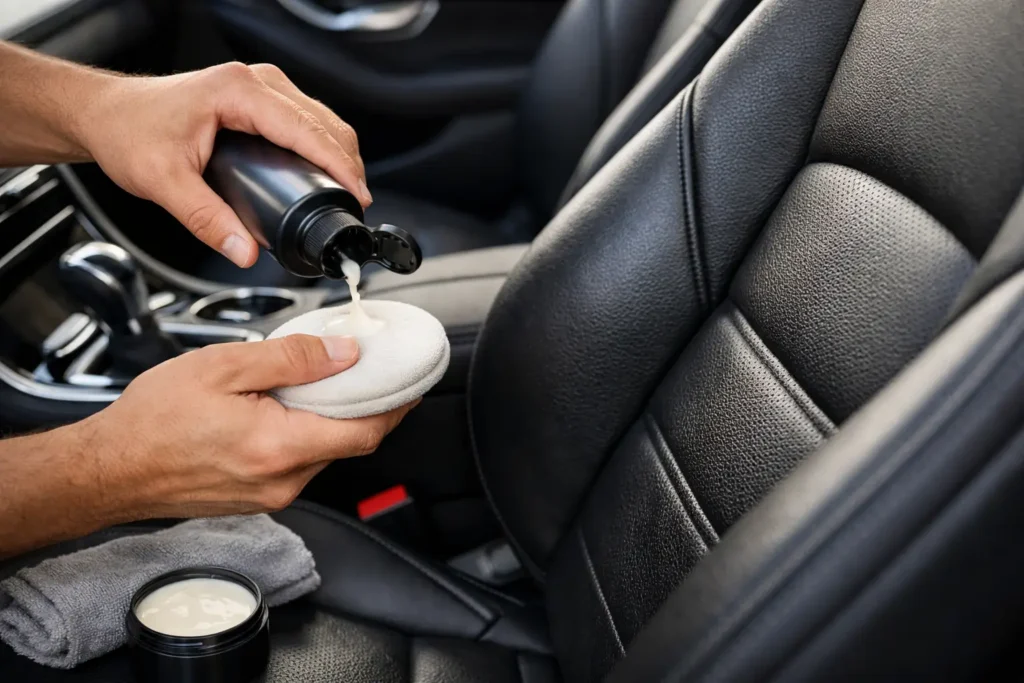
Put a small amount of conditioner on a clean applicator pad or microfiber towel. Start with less than you think you need. Spread it in a thin, even layer across one section at a time, using gentle overlapping motions.
Focus on high-wear areas such as outer bolsters, the front edge of the driver’s cushion, and armrests. Do not saturate seams or perforated sections. With modern coated automotive leather, more conditioner does not equal more protection. It usually means more residue to buff away.
6. Allow it to set, then buff off excess
Follow the product’s directions for dwell time. Many conditioners need only a few minutes before you wipe the surface with a dry microfiber towel. Buff lightly until the seat feels dry to the touch and has an even, natural finish.
If the seat feels greasy, slick, or leaves product on your hand, you used too much. Wipe it again with a clean towel. If necessary, lightly clean the surface and start over with a much thinner application.
7. Let the cabin air out before driving
Leave the doors open for a few minutes or run the ventilation system before your next drive. This helps any product scent dissipate and ensures the seats are fully dry. Never drive with a slippery seat surface, especially if you treated the driver’s seat.
How Often Should You Condition Car Leather?
For most vehicles, conditioning every three to six months is plenty. If your car spends a lot of time in direct sun, has light-colored leather, or sees heavy daily use, you may lean closer to every three months. A garage-kept vehicle with low mileage may only need treatment twice a year.
Cleaning frequency is different. Wiping spills promptly and lightly cleaning high-touch areas every month or two can prevent buildup that requires more aggressive work later. The driver’s seat, steering wheel, shift knob, and center armrest usually need the most attention.
Over-conditioning is a common mistake. Leather that looks oily or unusually glossy is not healthier. It is often carrying a layer of product that attracts dust and makes the cabin feel less clean.
Common Mistakes That Shorten Leather Seat Life
The biggest mistake is conditioning dirty seats. Dirt, sweat, and skin oils build up slowly, particularly on light interiors, and conditioner will not remove them. Clean first, then protect.
Another mistake is treating every surface as leather. Seat sides, rear panels, headrest backs, and trim pieces may be vinyl even when the seating inserts are genuine leather. Check your owner’s manual if you are unsure, or use products labeled safe for both leather and vinyl.
Be careful with perforated seats. Excess liquid can settle inside the holes and take longer to dry. Apply products to the towel rather than the seat, and use minimal product around ventilation openings.
Finally, do not expect conditioner to repair cracking, peeling, or worn color. Conditioner can improve feel and reduce future dryness, but it cannot rebuild a damaged coating. Small cracks, torn seams, or peeling areas may need leather repair products or professional upholstery work.
Protect Leather Between Conditioning Sessions
Regular habits do more for leather than frequent product use. Use a windshield sunshade when parked outside, clean spills right away, and avoid leaving wet towels, gym clothes, or food containers on the seats. If you wear rough workwear or carry tools in the cabin, a fitted seat cover can prevent unnecessary wear during the workweek.
A clean microfiber towel kept in the glove box is useful for quick spill response. Blot liquids rather than rubbing them into the seat, then follow up with a proper cleaning when you get home.
Well-maintained leather should feel smooth, look even, and support you without becoming slick. Treat conditioning as a light maintenance step, not a heavy restoration treatment, and your seats will be much easier to keep looking good mile after mile.